-40%
2X PERSONALISED VINYL DECAL. for Cot, Toybox, Nursery. CUSTOM COLOUR & FONT
$ 4.4
- Description
- Size Guide
Description
page1#header1 { font-family: Arial,Helvetica,sans-serif; font-size: xx-large; color: #ffcc00; font-weight: bold; text-transform: uppercase; text-align: center; } head2 { font-family: Arial Black; font-size: x-large; color: silver; }
2X PERSONALISED
CREATE YOUR OWN CUSTOM TEXT
Vinyl Transfer
This listing is for your custom decal x2, each decal must be the same
.
Please select 'Buy it Now' and send an Ebay message with the following information:
Custom Text -
What do you want writing? An order can not be completed without this information. Please stay within 16 characters. If you require more characters, please send us a message first.
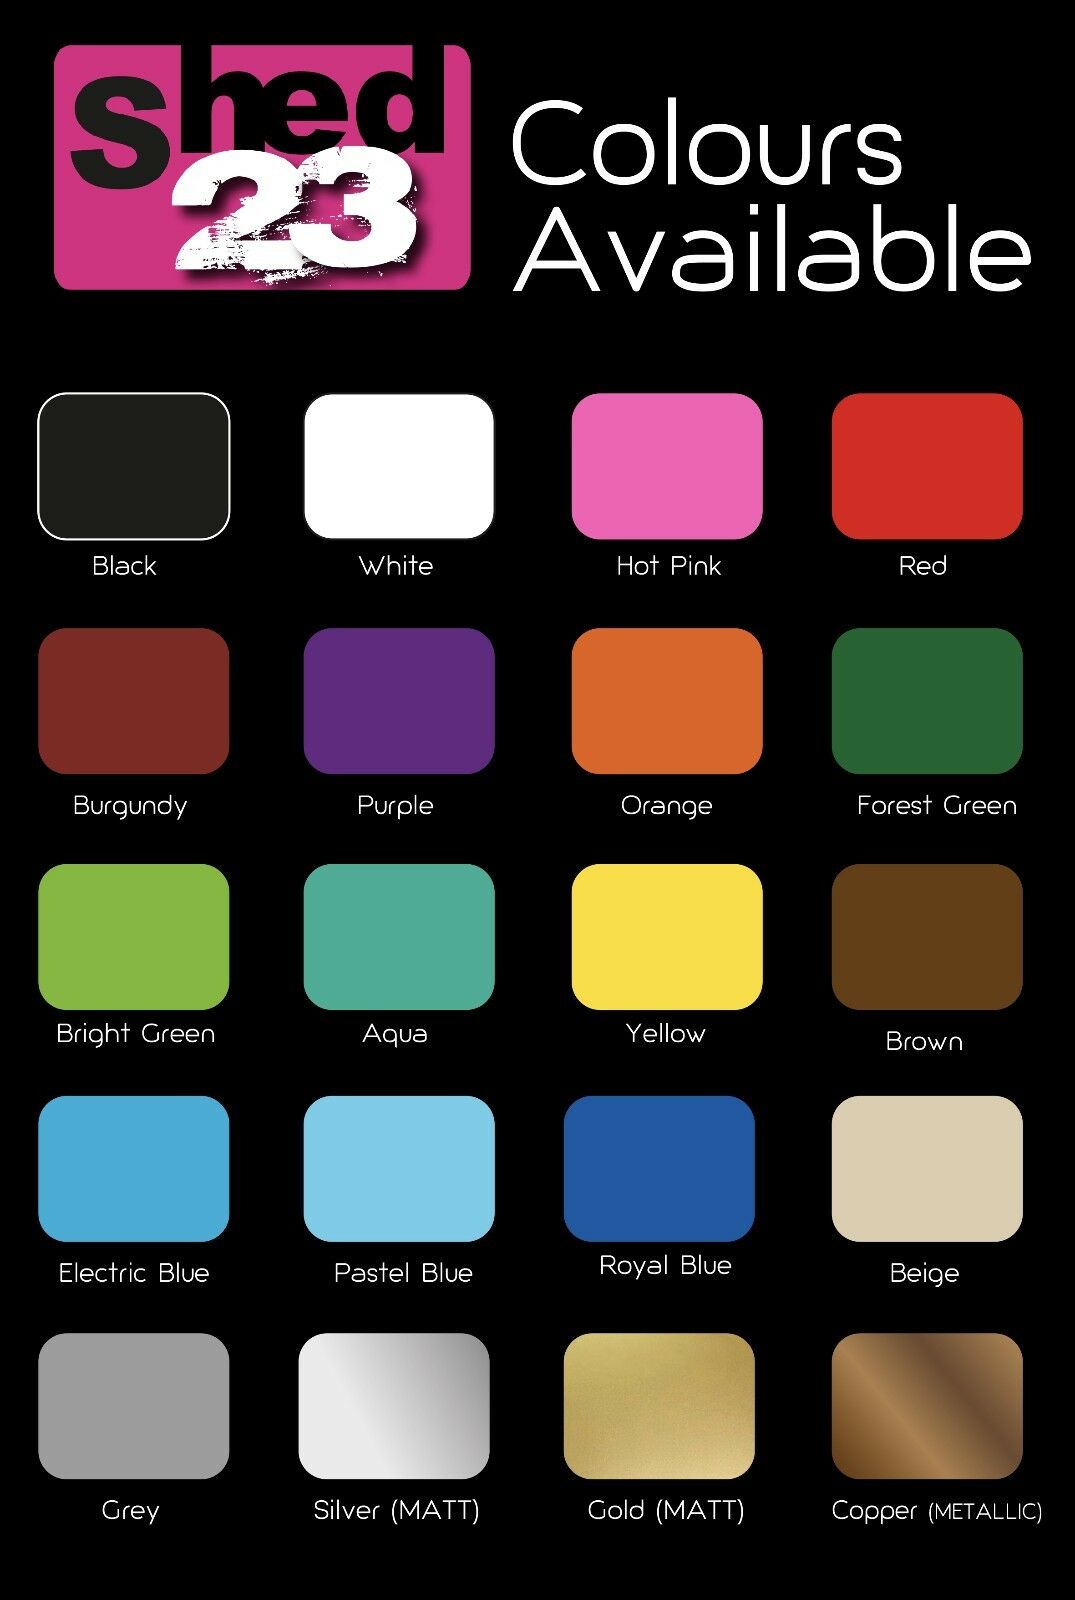
Colour -
If no colour is requested then Black will be sent as default.
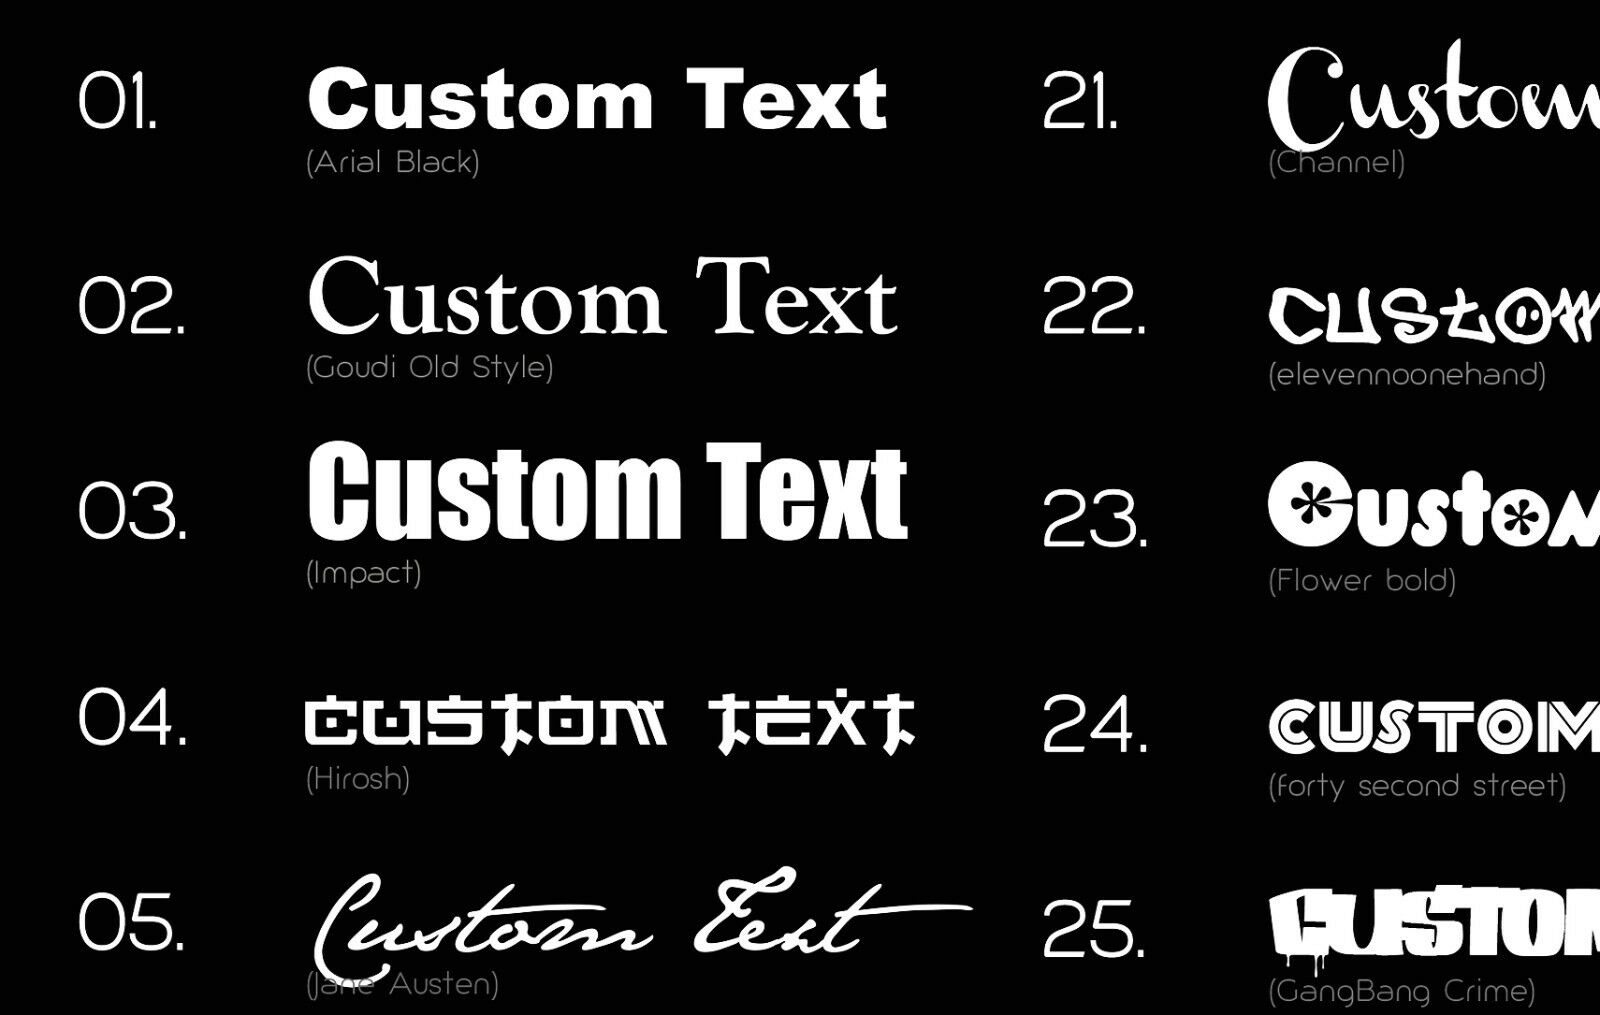
Font -
Please choose from the list below.
If no font is requested then font 01 will be sent as default.
Size -
Please let me know your ideal width between 10-18cms if no size is given then 12cms width will be sent as default.
This is a single colour decal with no background (the colour of the surface which you are putting it on will be seen through the gaps).
Please note -
On screen colours may vary from each persons monitor. We
have tried to illustrate as closely as possible but some
variation from what you are expecting may occur.
Some fonts are pre-defined in either lowercase or
capitals. If this will be a problem then please ask before making
a purchase.
- Trust in our quality -
All of our decals are made with Italian manufactured, Ritrama M300 series vinyl. This 70 Micron vinyl is industry standard and if applied correctly, could last 5 years or more.
- How to Apply -
How do I stick my new wall stickers to my chosen surface?
Your decal is made of long-lasting fade resistant vinyl. This product works best on a SMOOTH surface and we do not recommend sticking them on rough walls. It can be more easily removed when heated with a hair dryer, but cannot be reused.
With all our decals, there are no background and the surface it is applies to, will show through. Think of your vinyl stickers in 3D. Your sticker comes in 3 layers.
Top layer -
Transfer Paper/tape
Middle layer -
Vinyl
Bottom layer -
Backing sheet
Applying your stickers to a wall:
Wipe your surface with a dry cloth and sand down any rough areas.
Lay your decal on a flat surface and use a squeegy or credit card to push any air bubbles out from the decal. This also makes sure the transfer paper is sufficiently stuck to the vinyl.
Remove the backing sheet so that the stickers are stuck to the transfer paper. Best working from one corner to the opposite corner at an angle. If the decal wants to stick to the backing sheet, slowly manipulate the bottom layer to help the decal to stick to the transfer paper.
Use a ruler/spirit level to determine the precise position on your wall.
Position your sticker according to your markers on the wall.
Working from top to bottom, using a credit/bank card to gently push the sticker down while softly pushing the air pockets to the closest border.
For larger pieces use soapy water to wet the whole sticker as well as the wall & apply while wet. This will allow you to move it until you’re happy with the position.
When you are happy take a soft cloth and wipe the whole sticker down.
Love your stickers!! Rub it down every now and then until the glue has settled.
Removing your stickers:
When removing the sticker, using a hair dryer to heat up the vinyl will make it easier
Keep the hair dryer about 10cm away while blowing on the part you are removing.
Applying your stickers to glass & very smooth surfaces:
Follow instructions on standard Vinyl sticker application up to the removal of the backing paper.
Spray the sticky side of your vinyl with a mixture of water and a few drops of either dishwashing liquid or baby shampoo and wet thoroughly. A fine misty type spray nozzle is best.
Then spray the glass or area that you are going to apply the vinyl to, as well. Do not be afraid of wetting your vinyl too much.
Apply the vinyl onto the wet area. Move it around until you are happy with the position.
Start from the top centre and wipe all excess water away until all bubbles and creases are smooth. A bank card works well.
Leave the application sheet on the vinyl for at least a couple of hours (overnight is best) before removing it. Once removed you can clean the residue carefully with a soft rag.
What surfaces will the wall decals adhere to?
Our vinyl sticks to most smooth, clean & dry surfaces. Customers have decorated a number of surfaces with success. These include: smooth walls, cupboards, fridges, glass & mirrors, cars, laptop covers, tiles, etc.
Does the sticker adhere to any type of paint?
Our stickers stick well on both enamel and acrylic paint. The smoothness of the surface is the most important.
Wait at least 2 weeks before applying your stickers to newly painted walls as the chemicals will damage the vinyl.
Please click on the logo
to see my other items
MPN
Does Not Apply
Gender
Boys & Girls
Brand
Unbranded
EAN
Does not apply
